Interior renovations can seem complex, but breaking the process into clear steps helps get the job done right. From bare framing to final finishes, every phase matters. The key to a successful transformation is efficiency, planning, and accuracy. Whether you're working on a single room or a full remodel, following a smart sequence ensures you stay on time and within budget. Let’s explore how to move from studs to a polished interior, one step at a time.

Starting with the Frame
Everything begins with the studs. These vertical wood or metal pieces form the skeleton of your walls. Before you build, measure carefully and mark your layout. Standard spacing is 16 inches on center, which allows for easy installation of insulation and wallboard later.
Framing should also include openings for doors, windows, and any built-in features. Be sure all corners, tees, and intersections are properly supported. A solid frame provides the foundation for everything that follows.
Electrical and Plumbing Comes Next
Once the walls are framed, it’s time to run your utilities. This includes electrical wiring, plumbing pipes, and any HVAC ductwork. Plan ahead by marking where switches, outlets, and fixtures will go.
Drill holes through the studs as needed, being careful not to compromise structural integrity. Always follow local building codes, and hire licensed professionals when required. After installation, all wiring and pipes should be inspected before covering the walls.
Insulation for Comfort and Efficiency
With utilities in place, insulation is the next layer. This step boosts energy efficiency and soundproofing. There are several options, including fiberglass batts, foam boards, and spray foam.
Choose the type based on your climate and wall structure. Fit insulation snugly between studs without compression. This ensures maximum performance. Proper insulation helps control indoor temperatures and reduce utility bills.
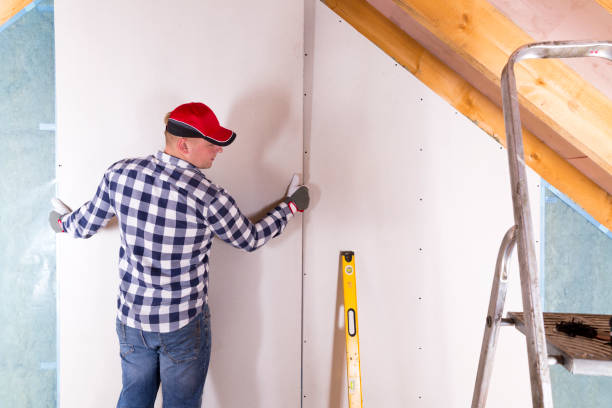
Wall Covering and Preparation
Now the project begins to take visible shape. At this stage, drywall installation is done to enclose the wall structure. Panels are measured, cut, and screwed into the framing. Joints are taped and finished with joint compound.
Once dry, the surface is sanded smooth and primed. This step creates a clean, even base for paint or wallpaper. Any imperfections in drywall work will be obvious after painting, so take time to get it right.
Trims, Casings, and Details
With the walls up, attention turns to the finer touches. Install baseboards, crown molding, and window casings. These elements hide seams and provide visual definition.
Use a miter saw for clean cuts and apply adhesive or nails to hold trim in place. Caulk gaps for a seamless look. Trim work brings polish to your interior and ties the design together.
Time to Hang the Doors
After the walls and trim are complete, it’s time for door installation. Whether you're using pre-hung doors or hanging a slab yourself, accuracy is key. The door must sit level and flush with the surrounding wall.
Use shims to adjust the frame and check alignment before securing. A properly installed door opens and closes smoothly with minimal gaps. Don’t forget the hardware—handles, locks, and hinges should be fitted securely.
Painting and Finishing Touches
Now the room is nearly done. Start with a coat of primer, then apply your chosen paint color. Use brushes for corners and rollers for large surfaces. Apply at least two coats for even coverage.
After painting, add any wall fixtures like shelves, mirrors, or art. Install outlet covers and clean the space thoroughly. This is the final stage that pulls the entire project together.
Smart Tips for a Smooth Process
Plan ahead: Know the order of tasks and have materials ready.
Measure twice: Avoid mistakes by checking all dimensions carefully.
Use the right tools: Don’t try to cut corners with the wrong equipment.
Stay organized: Keep the workspace clean and safe.
Inspect frequently: Fix small issues before they become big problems.
Conclusion
Transforming an interior space isn’t about rushing through each phase. It’s about doing every step right. From the studs to the final coat of paint, each part builds on the last. With a clear plan and attention to detail, you can achieve professional results—even on a tight schedule.
By focusing on quality and efficiency, your finished space will be both beautiful and functional. Whether you're upgrading a single room or remodeling a whole home, this step-by-step approach delivers lasting results.